


Extreme Makeover: Piñata Edition
You probably know by now that I love making my own piñatas, buuuut sometimes you just don’t have the time to shape, glue and fringe. Scroll down to see how I transform a store bought piñata to fit my color scheme for Cinco de Mayo!


Here’s what you’ll need:
Store bought piñata
Tissue paper
Piece of fabric ( I used a scrap piece of Cambaya fabric that I had on hand)
Floral wire (you could also use pipe cleaners)
Scissors
Get started:
Grab your spray paint and a cardboard box or trash bag ( to lay on the ground prior to spray painting)
Remove any unnecessary pieces from the piñata. In my case, I removed the eyes and tail
Begin spray painting. I liked to go from the bottom of the piñata up so that I’m sure to get the under part of the fringe.
Once you’re all done let it dry and lets move on to the decorations!


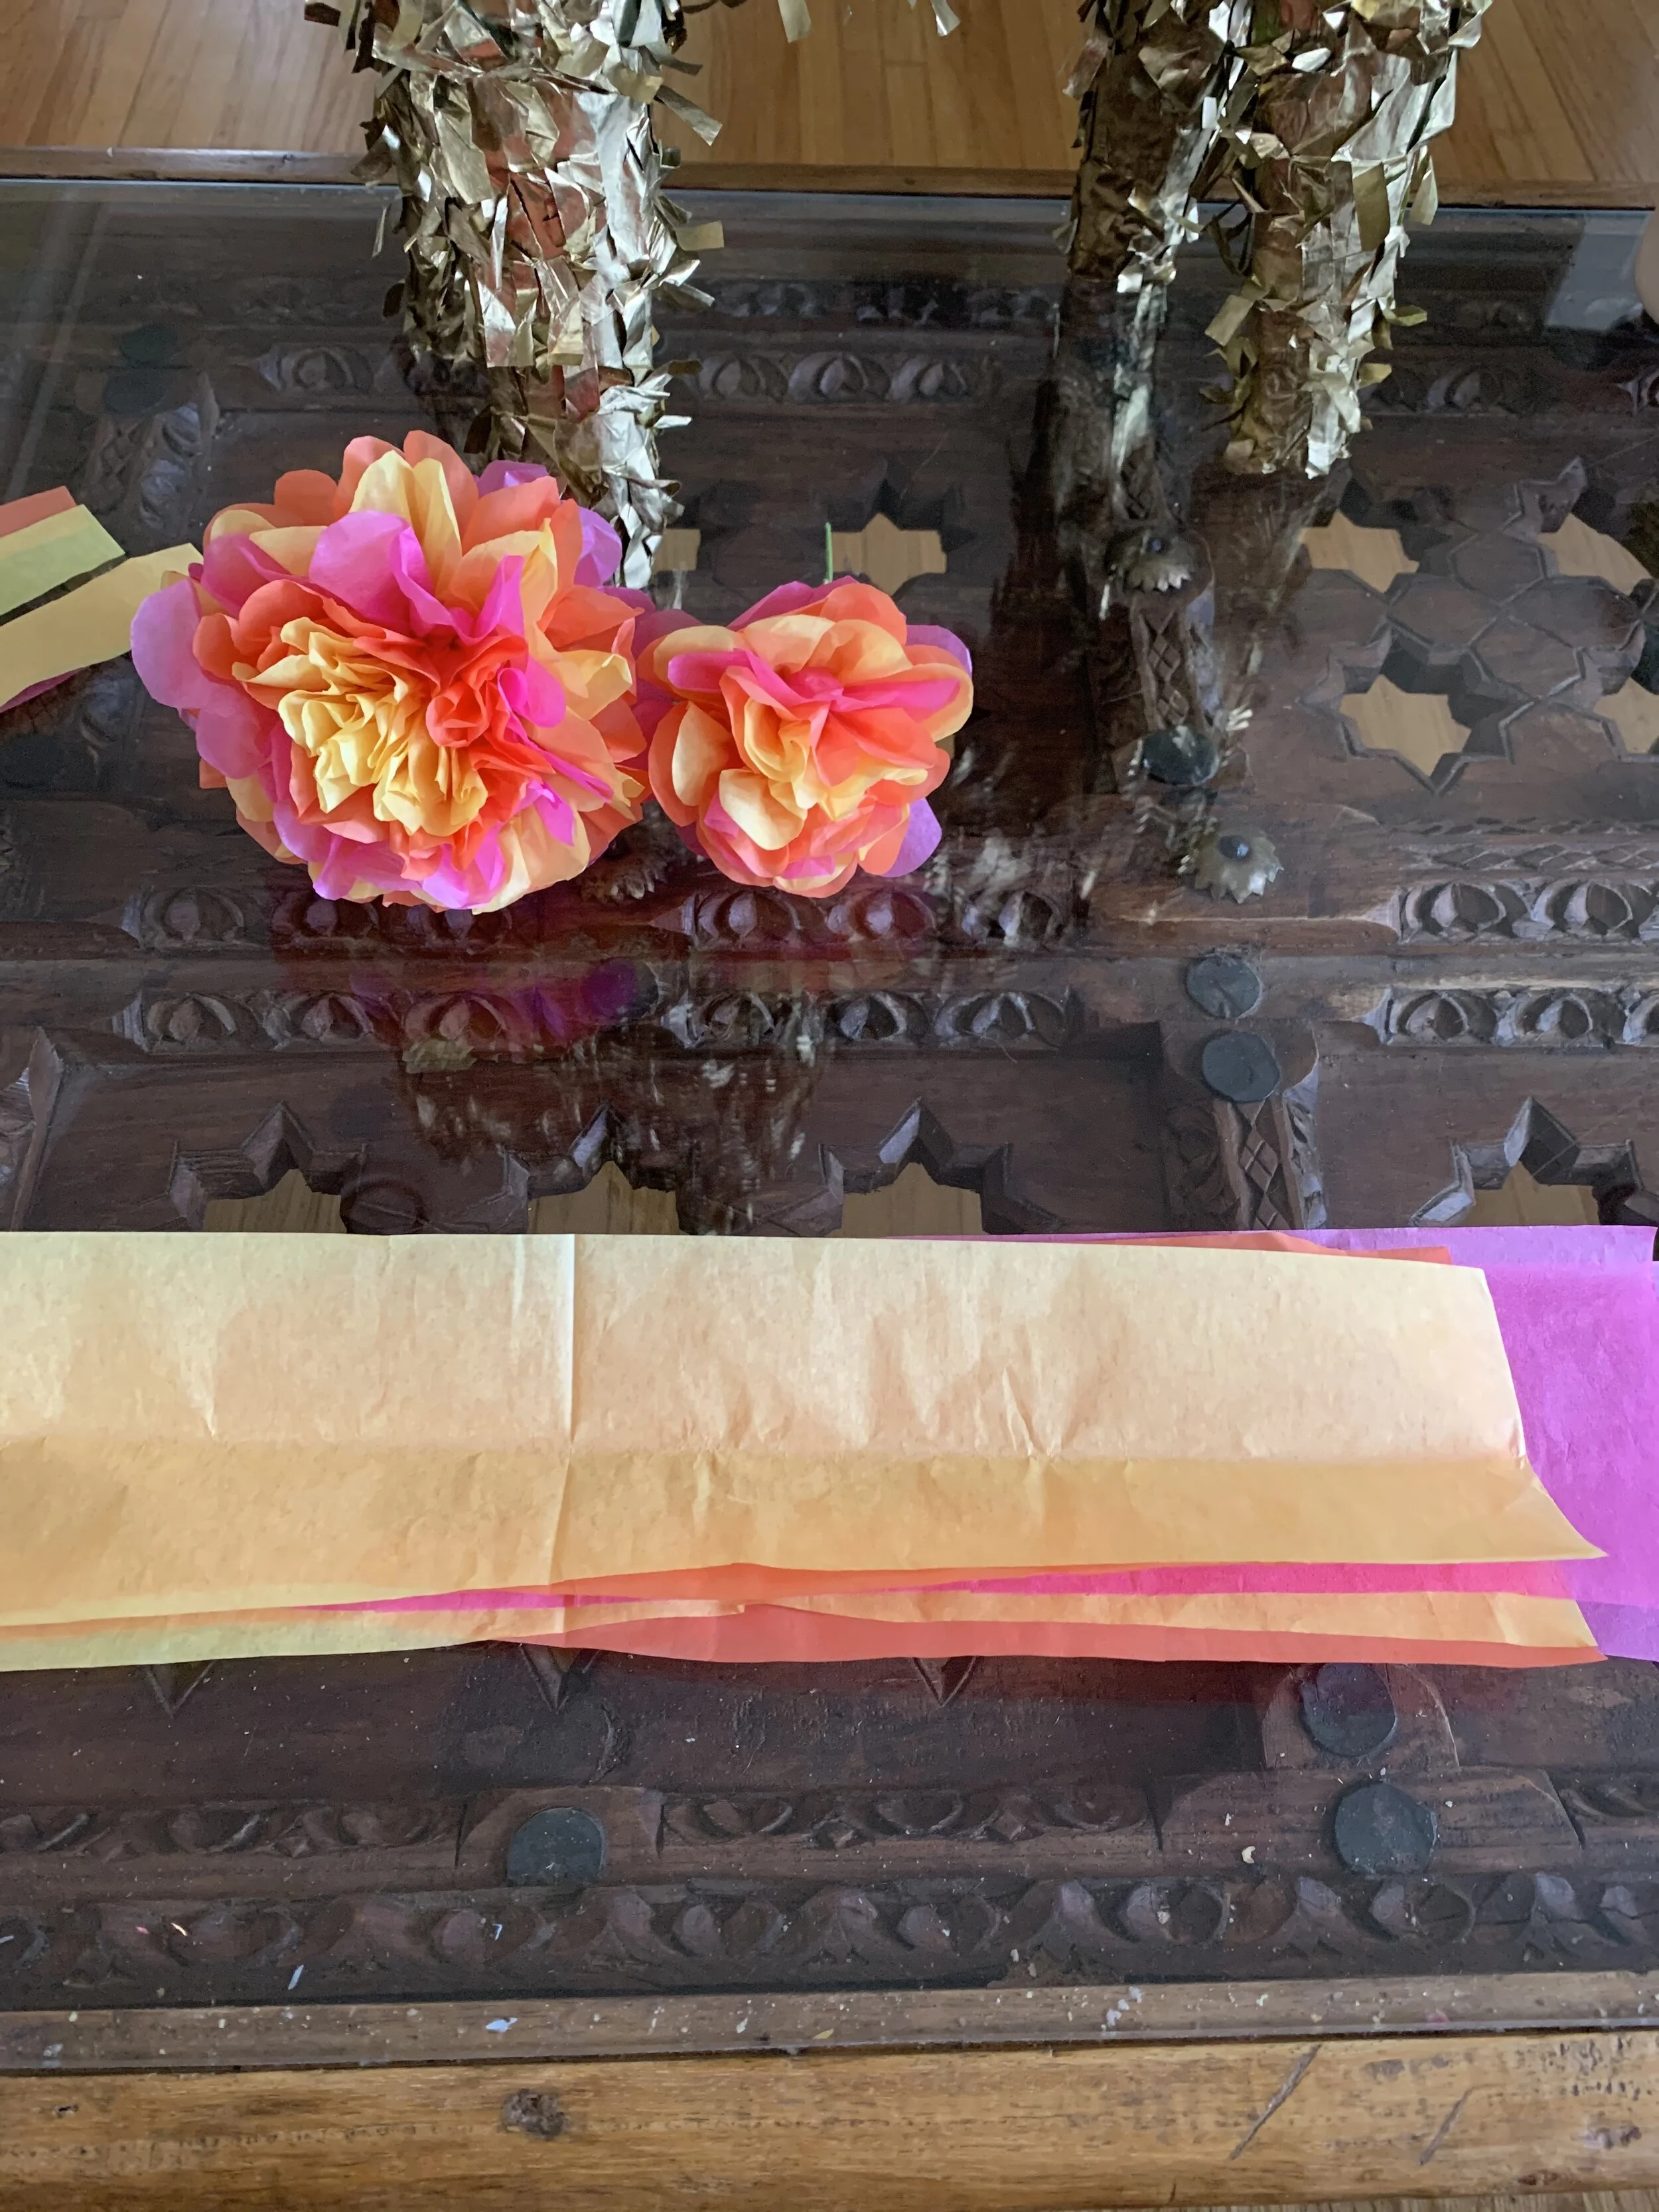
Mexican Tissue Flowers
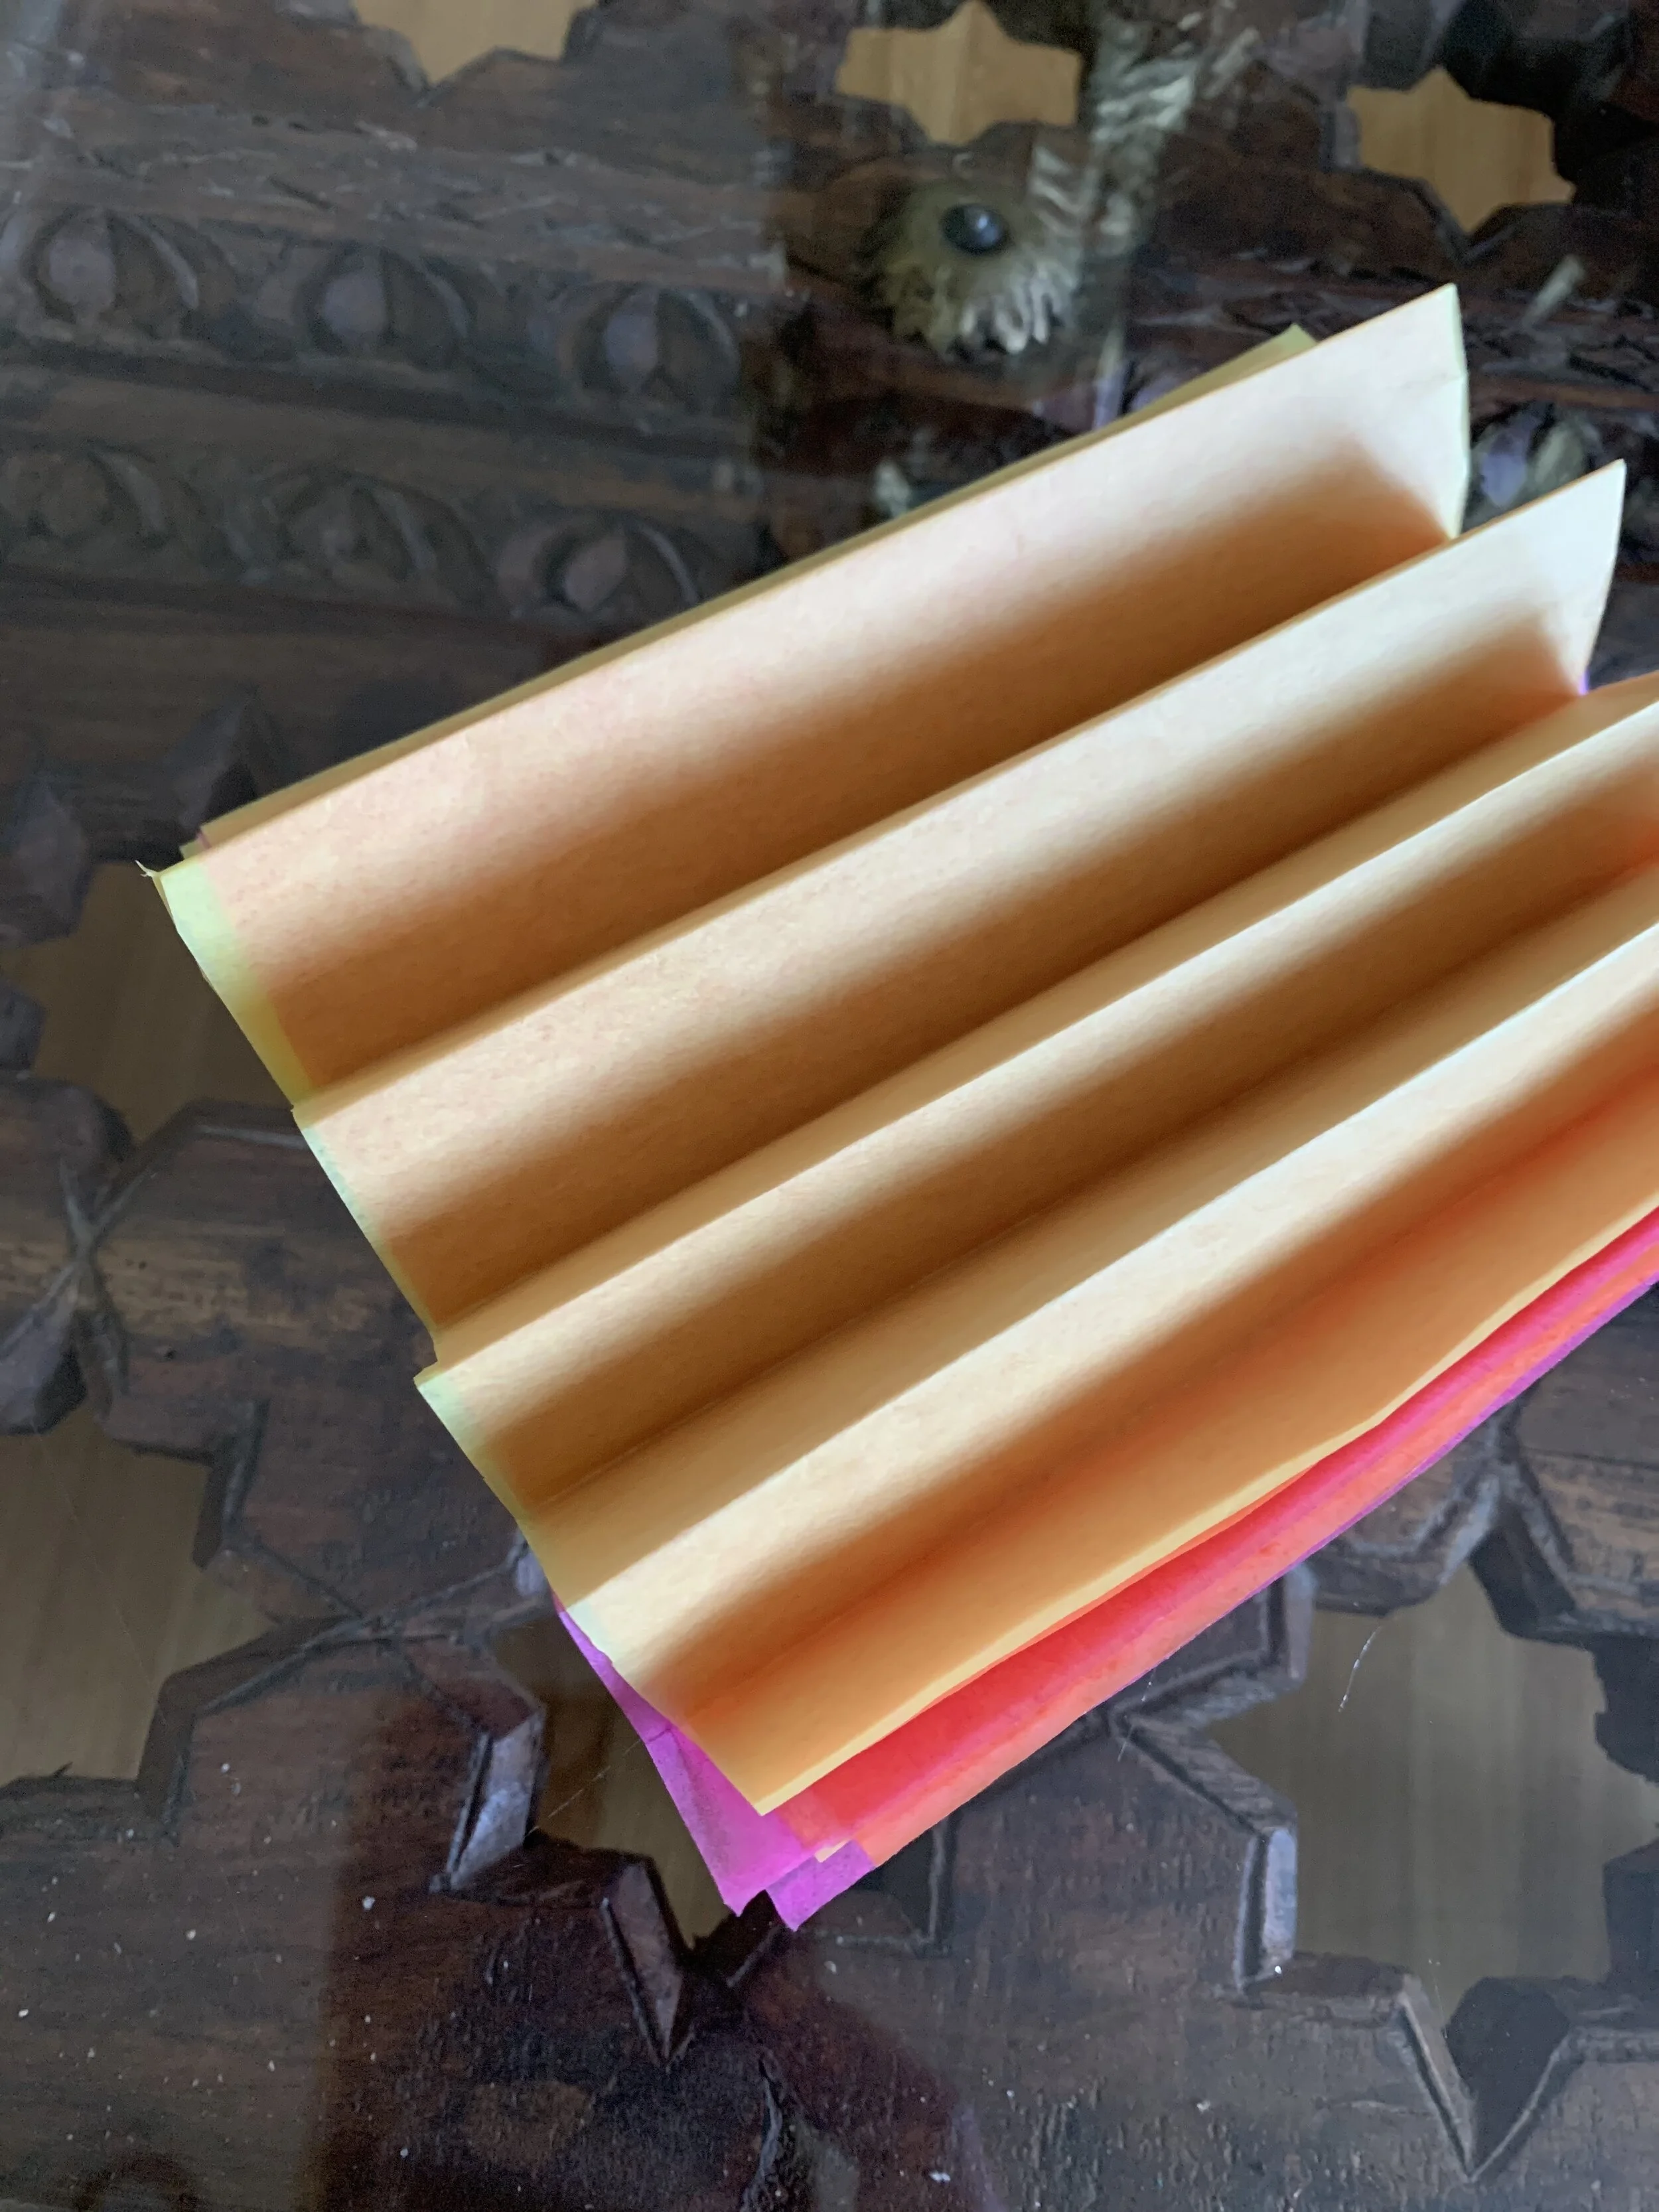
Take 6 pieces of tissue paper, preferably 3 different colors - I cut the large sheets down to approximately 8x8. You can use any size tissue paper you like, just know that the width will determine the overall size of your flower.
Alternate the paper colors. I did pink, orange, yellow - make sure your top piece is the color you want the inner part of your flower - in my case, yellow.
Begin accordion folding the tissue (approximately an inch thick)
Fold your accordion paper in half so that you can find the center mark. Once you do that, unfold and wrap your wire where the crease that you made is and secure it.
Take your scissors and round off the ends of the paper
Now we are going to start shaping the “petals”. You want to make sure you don’t tug too much on the paper when doing this since tissue paper is more delicate and you don’t want to rip it (if it does rip, no biggie - just scrunch it up a little and no one will ever know)
Spread out the accordion fold
Starting with the top pieces lift one side up as much as you can and then do the other side. The flowers turn out best when you alternate sides opposed to doing one side all at once.
Repeat for the rest of the layers. When I get to the second half, I try not to pull them up as tight because I like the way it looks more organic
Once your flowers are made, use your scissors to poke a small hole(s) into your piñata wherever you want them placed and using your wire (you may have to bend the excess a bit) stick them in the hole


Tissue Paper Tassel - Tail
I had some long pieces left over from when I originally cut my tissue paper for the flowers so I decided to use that to make a tail (the pieces left over were approximately 3”x16”).
Keep the paper layered, fold in half to find the middle point, just like when we did the flowers
Once you find your middle, cut thin strips towards the fold to create fringe, leaving about 1 inch uncut at the fold line. I actually used a clothespin (chip clip, paper clip - whatever you can find) to mark this point and to keep my sheets together when I began cutting.
Repeat this step and complete the other end too.
Once your cutting is complete, begin rolling tightly down the middle crease. Continue rolling, fold in half and then twist to create a loop.
Using your scissors again, make a small hole to stick the loop in to create your tail and trim if needed.


Tag me if you transform your own piñata, I’d love to see what you do!
Cheers!
Ashlee

