


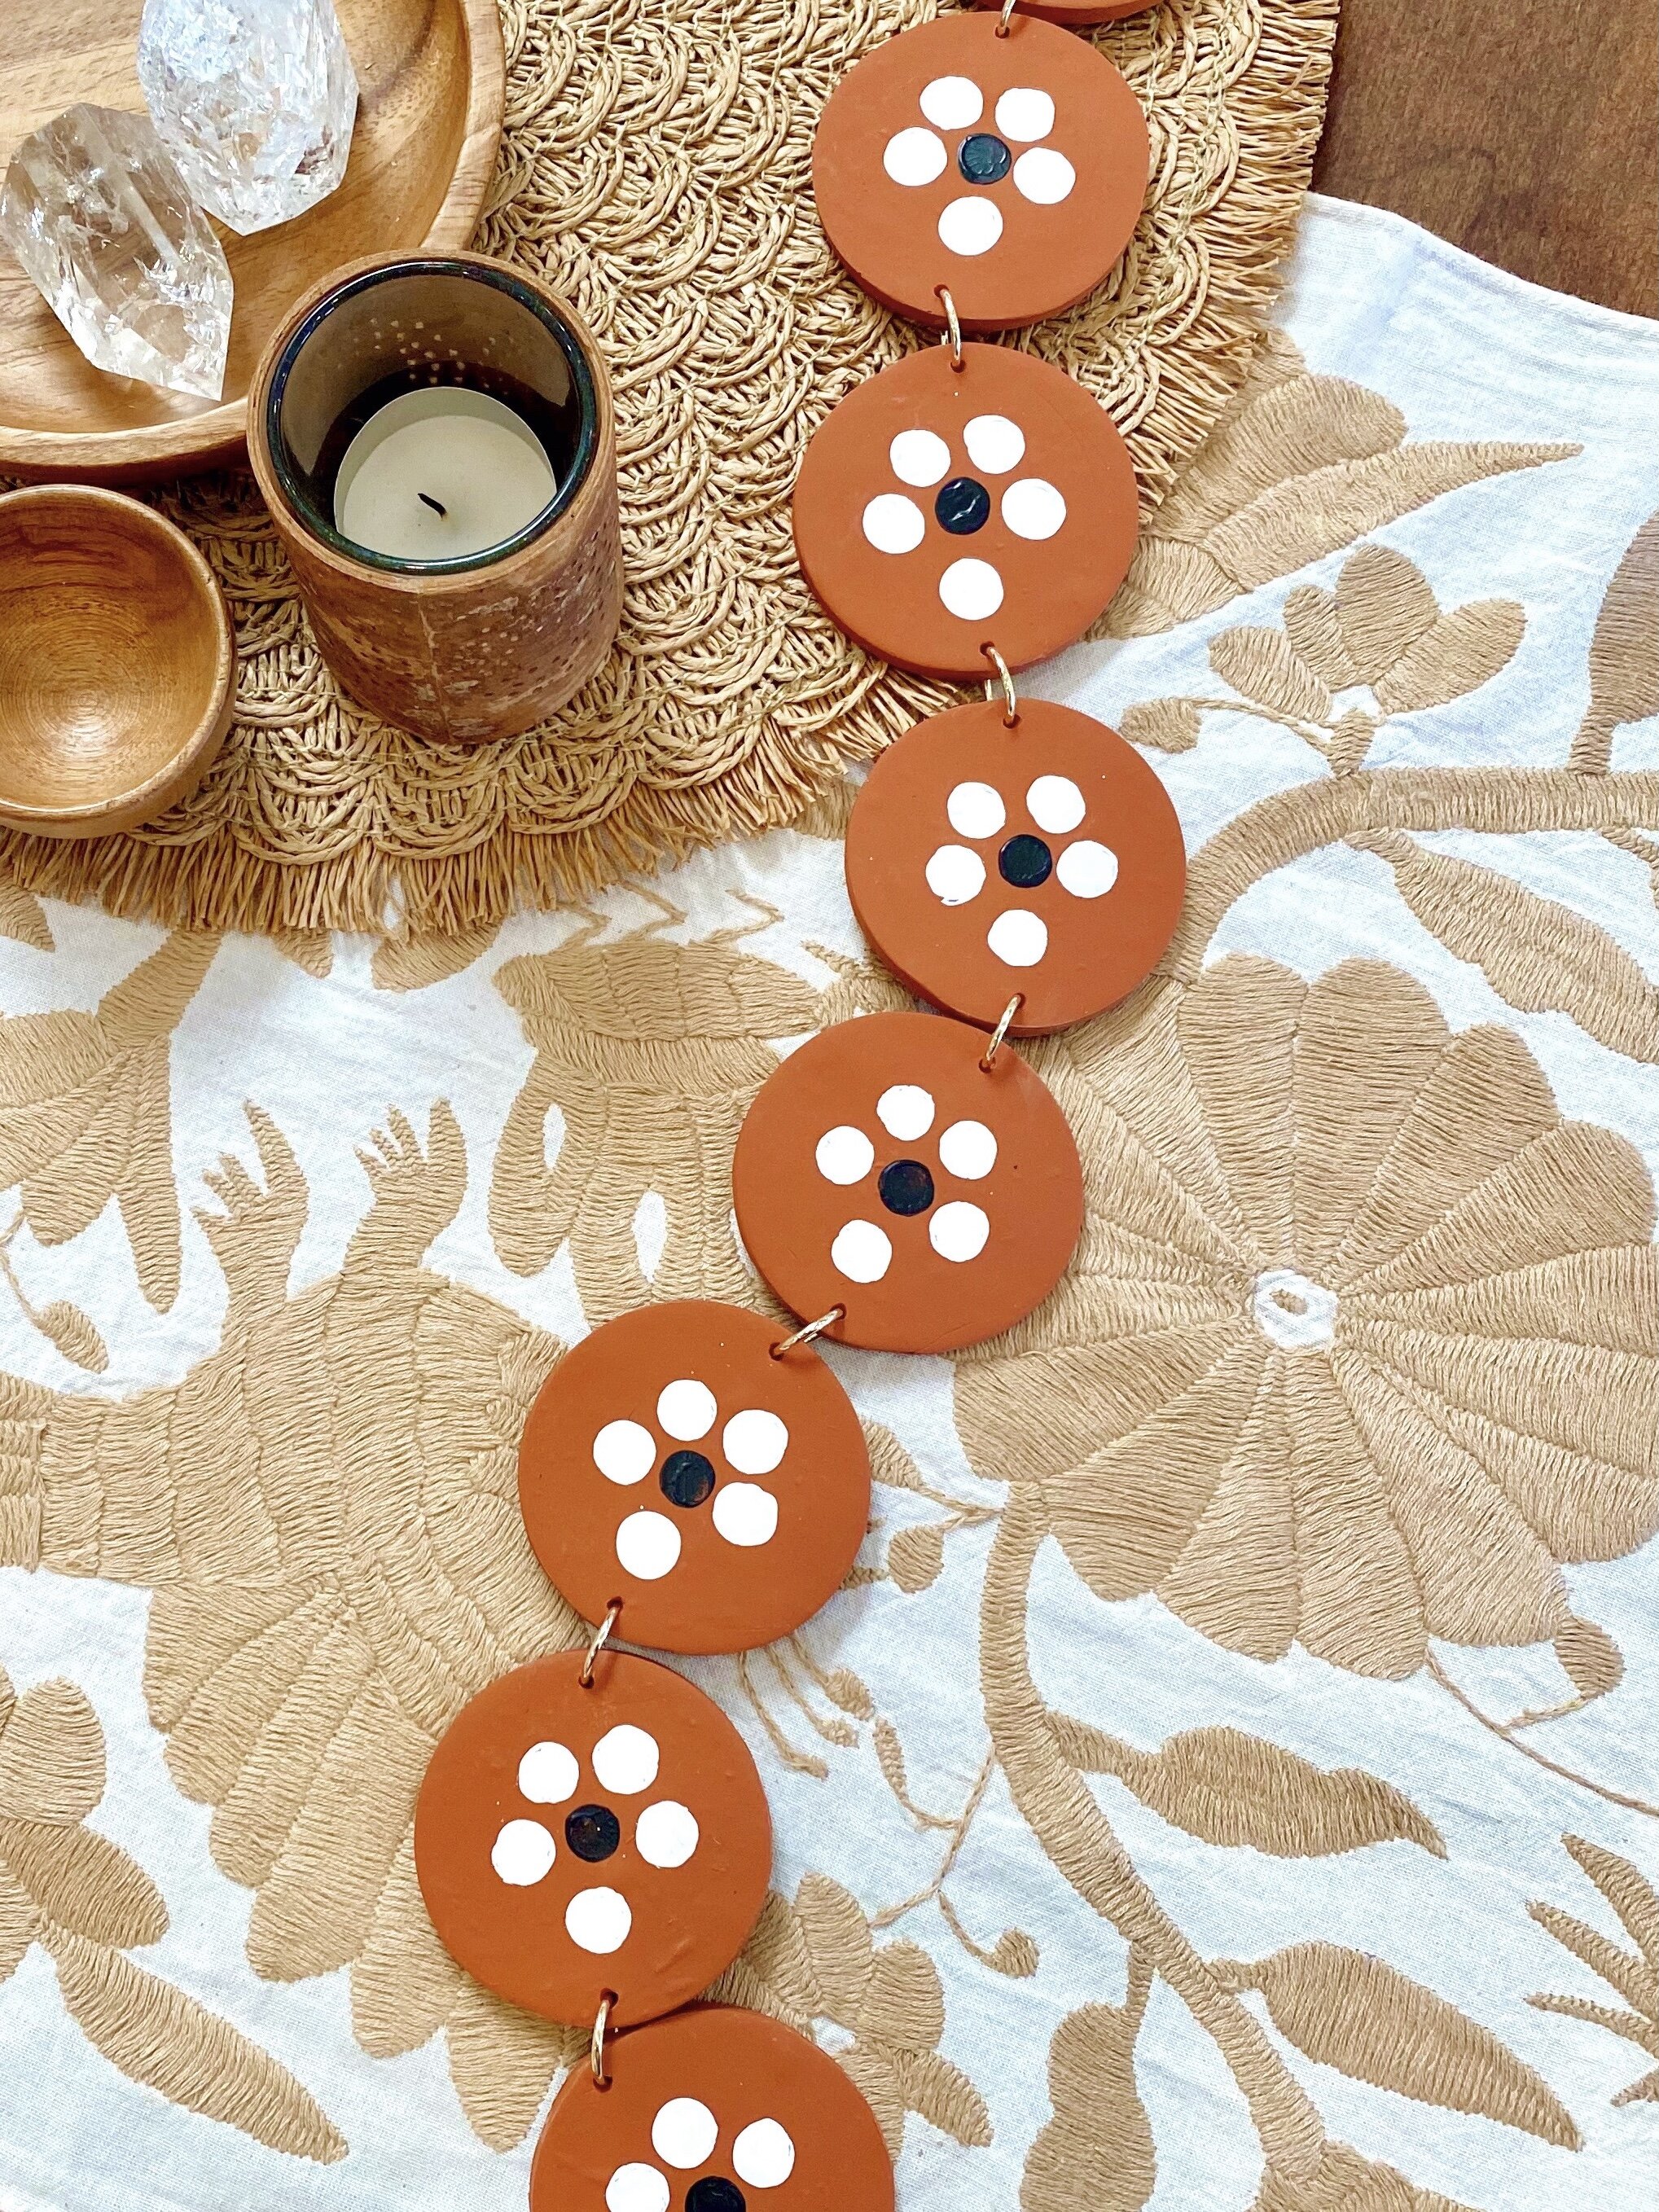
Clay Wall Hanging
I’ve never been a fan of clay crafts…until now!
I love how this turned out and it was super easy. Check out the steps below and be sure to tag me if you make your own!


Materials:
Acrylic Paint (white, black)
Wax Paper
Rolling Pin
Embroidery Needle
Baking Sheet


Steps:
Lay your wax paper down on a hard surface and roll out your clay with a rolling pin. I rolled mine out to about 1/4” making sure the clay was even.
I used my biscuit cutter and began cutting out my circles. I did step 1 and 2 twelve times.
Once your circles are cut out, take your embroidery needle or something thin that you can make a hole with (I’ve used a nail before).
Make holes on the top and bottom of 11 circles and only one top hole one the 12th circle (this will be your last hanging disk)
Once your disks are shaped and holes are made, place them on your baking sheet and bake in the oven according to the clay packaging.
Once circles are cooled pour some paint out to begin making your flowers. I used the back of two different sized foam brushes to make the circles and then went back with a normal pain brush to fill in any spots that were sparse.
Allow paint to fully dry.
Open up some of your jump rings and begin attaching your pieces. It is a lot easier to open and close your rings with jewelry pliers.
Once they are all connected, attach an additional jump ring the the top disc. This is how you will hang it on a wall.


Get creative when making this and let me know if you switch up the shapes or design!
Cheers!
Ash

