


Lucky Lana, Good Luck Tradition
New Years Eve is a magical night that is filled with hope, laughter and superstitious traditions!
This year my family and I will partake in our usual rituals of putting a suitcase by the door and eating 12 grapes but we are adding a new one! In parts of Mexico, it is tradition to hang a little lamb behind the front door to bring wealth and abundance in the new year. Here is my take on our new tradition!


Here’s what you’ll need to make your own Lucky Lana!
Materials
*for sheep
Felt (at least two colors - one for the hair and the other for face and ears)
Scissors
Pen or thin marker
Embroidery string
Embroidery needle
Hot glue gun
Hot glue sticks
Cotton balls
Piece of yarn/string/ribbon (to hang on door)
Wax Paper
*for tassel
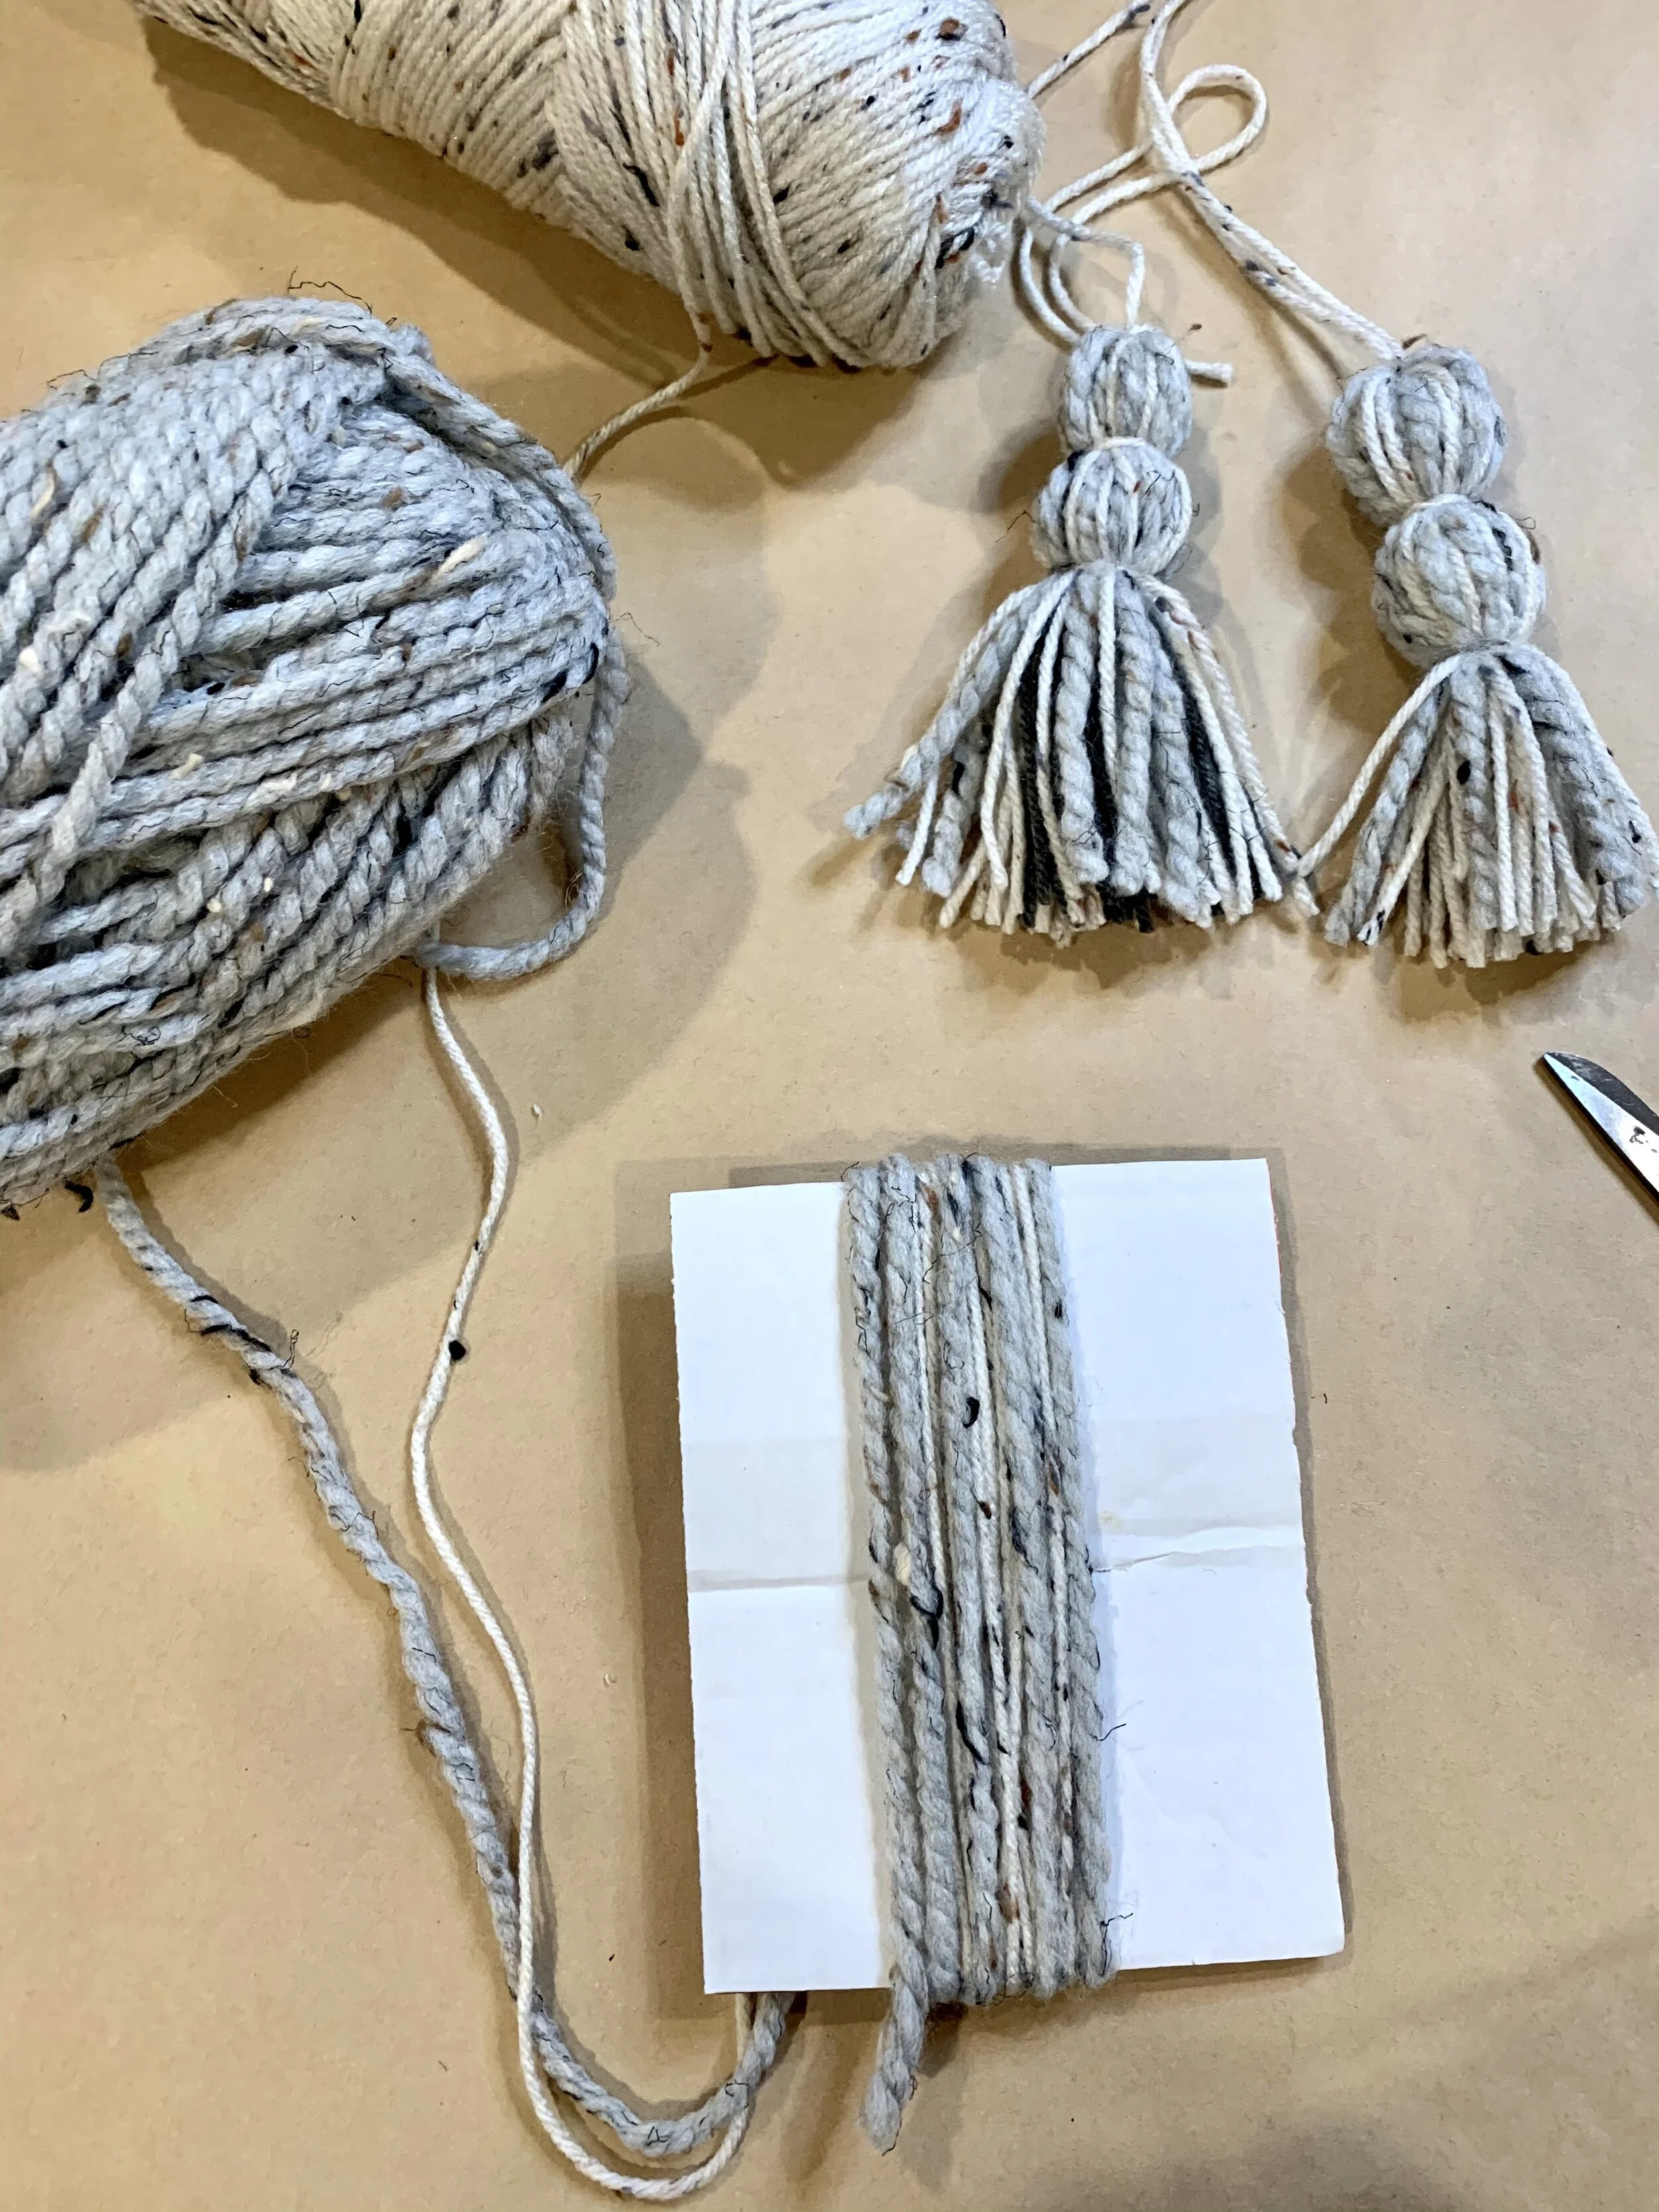
6” Piece of cardboard
Yarn ( I used 3 different types)

Instructions for Tassel
To make a tassel, grab your piece of cardboard (the size of the cardboard will determine how long your tassels will be), scissors and yarn
Wrap the yarn around the piece of cardboard at least 15-20 times (the more times you wrap it the thicker it will be)
Once you are done wrapping cut a small piece of yarn and slip it behind the yarn you just wrapped, slide it to the top of the cardboard and tie in a knot.
Then take your scissors and cut the bottom of the strings while it is still on the cardboard.
Cut a second piece of yarn, and tie around the top of the tassel, let the excess string hang ( I did this step twice to give a different look to my tassel)
You can leave as is or trim the ends to your desired length
With the two pieces of string that you knotted on top, you can use that to attach to the sheep face


Instructions for Sheep
Print template and cut out (easiest if printed on card stock)
Trace template on felt sheet (I like to fold my felt to double it when I cut the head and ears since I will need 2 pieces and then I laid it back to one piece to cut the hair)
Cut traced felt
With your marker or pen, draw a face onto your wax paper and pin on top of one of the face shapes
Thread your needle with your black floss, being sure to double know the end of one side and you’ll begin making two French knots over the wax paper for the eyes and chain stitching the nose and mouth. (see instructional videos below from Cutesy Crafts)


Once you have embroidered your face, it’s time to stitch everything together (at the bottom of the post, there are step by step pictures on how to blanket stitch as well as a video from Red Ted Art!)
Heat up your hot glue gun. While that is warming up cut a piece of string, ribbon or yarn long enough to create a loop to hang your sheep on your door. * I chose a piece of red yarn. Double knot the two ends together and hot glue it on the inside of the back face shape.

Thread your needle and knot the tail end. Start between the two layers, to the side of your yarn that you just hot glued, and poke your needle down through the bottom layer. This will put your knot in between the two layers. This should be done about 1/4" in from the edge, or at whatever length you want your stitches to be.
Begin stitching around the face, trying to keep the same distance all the way around.
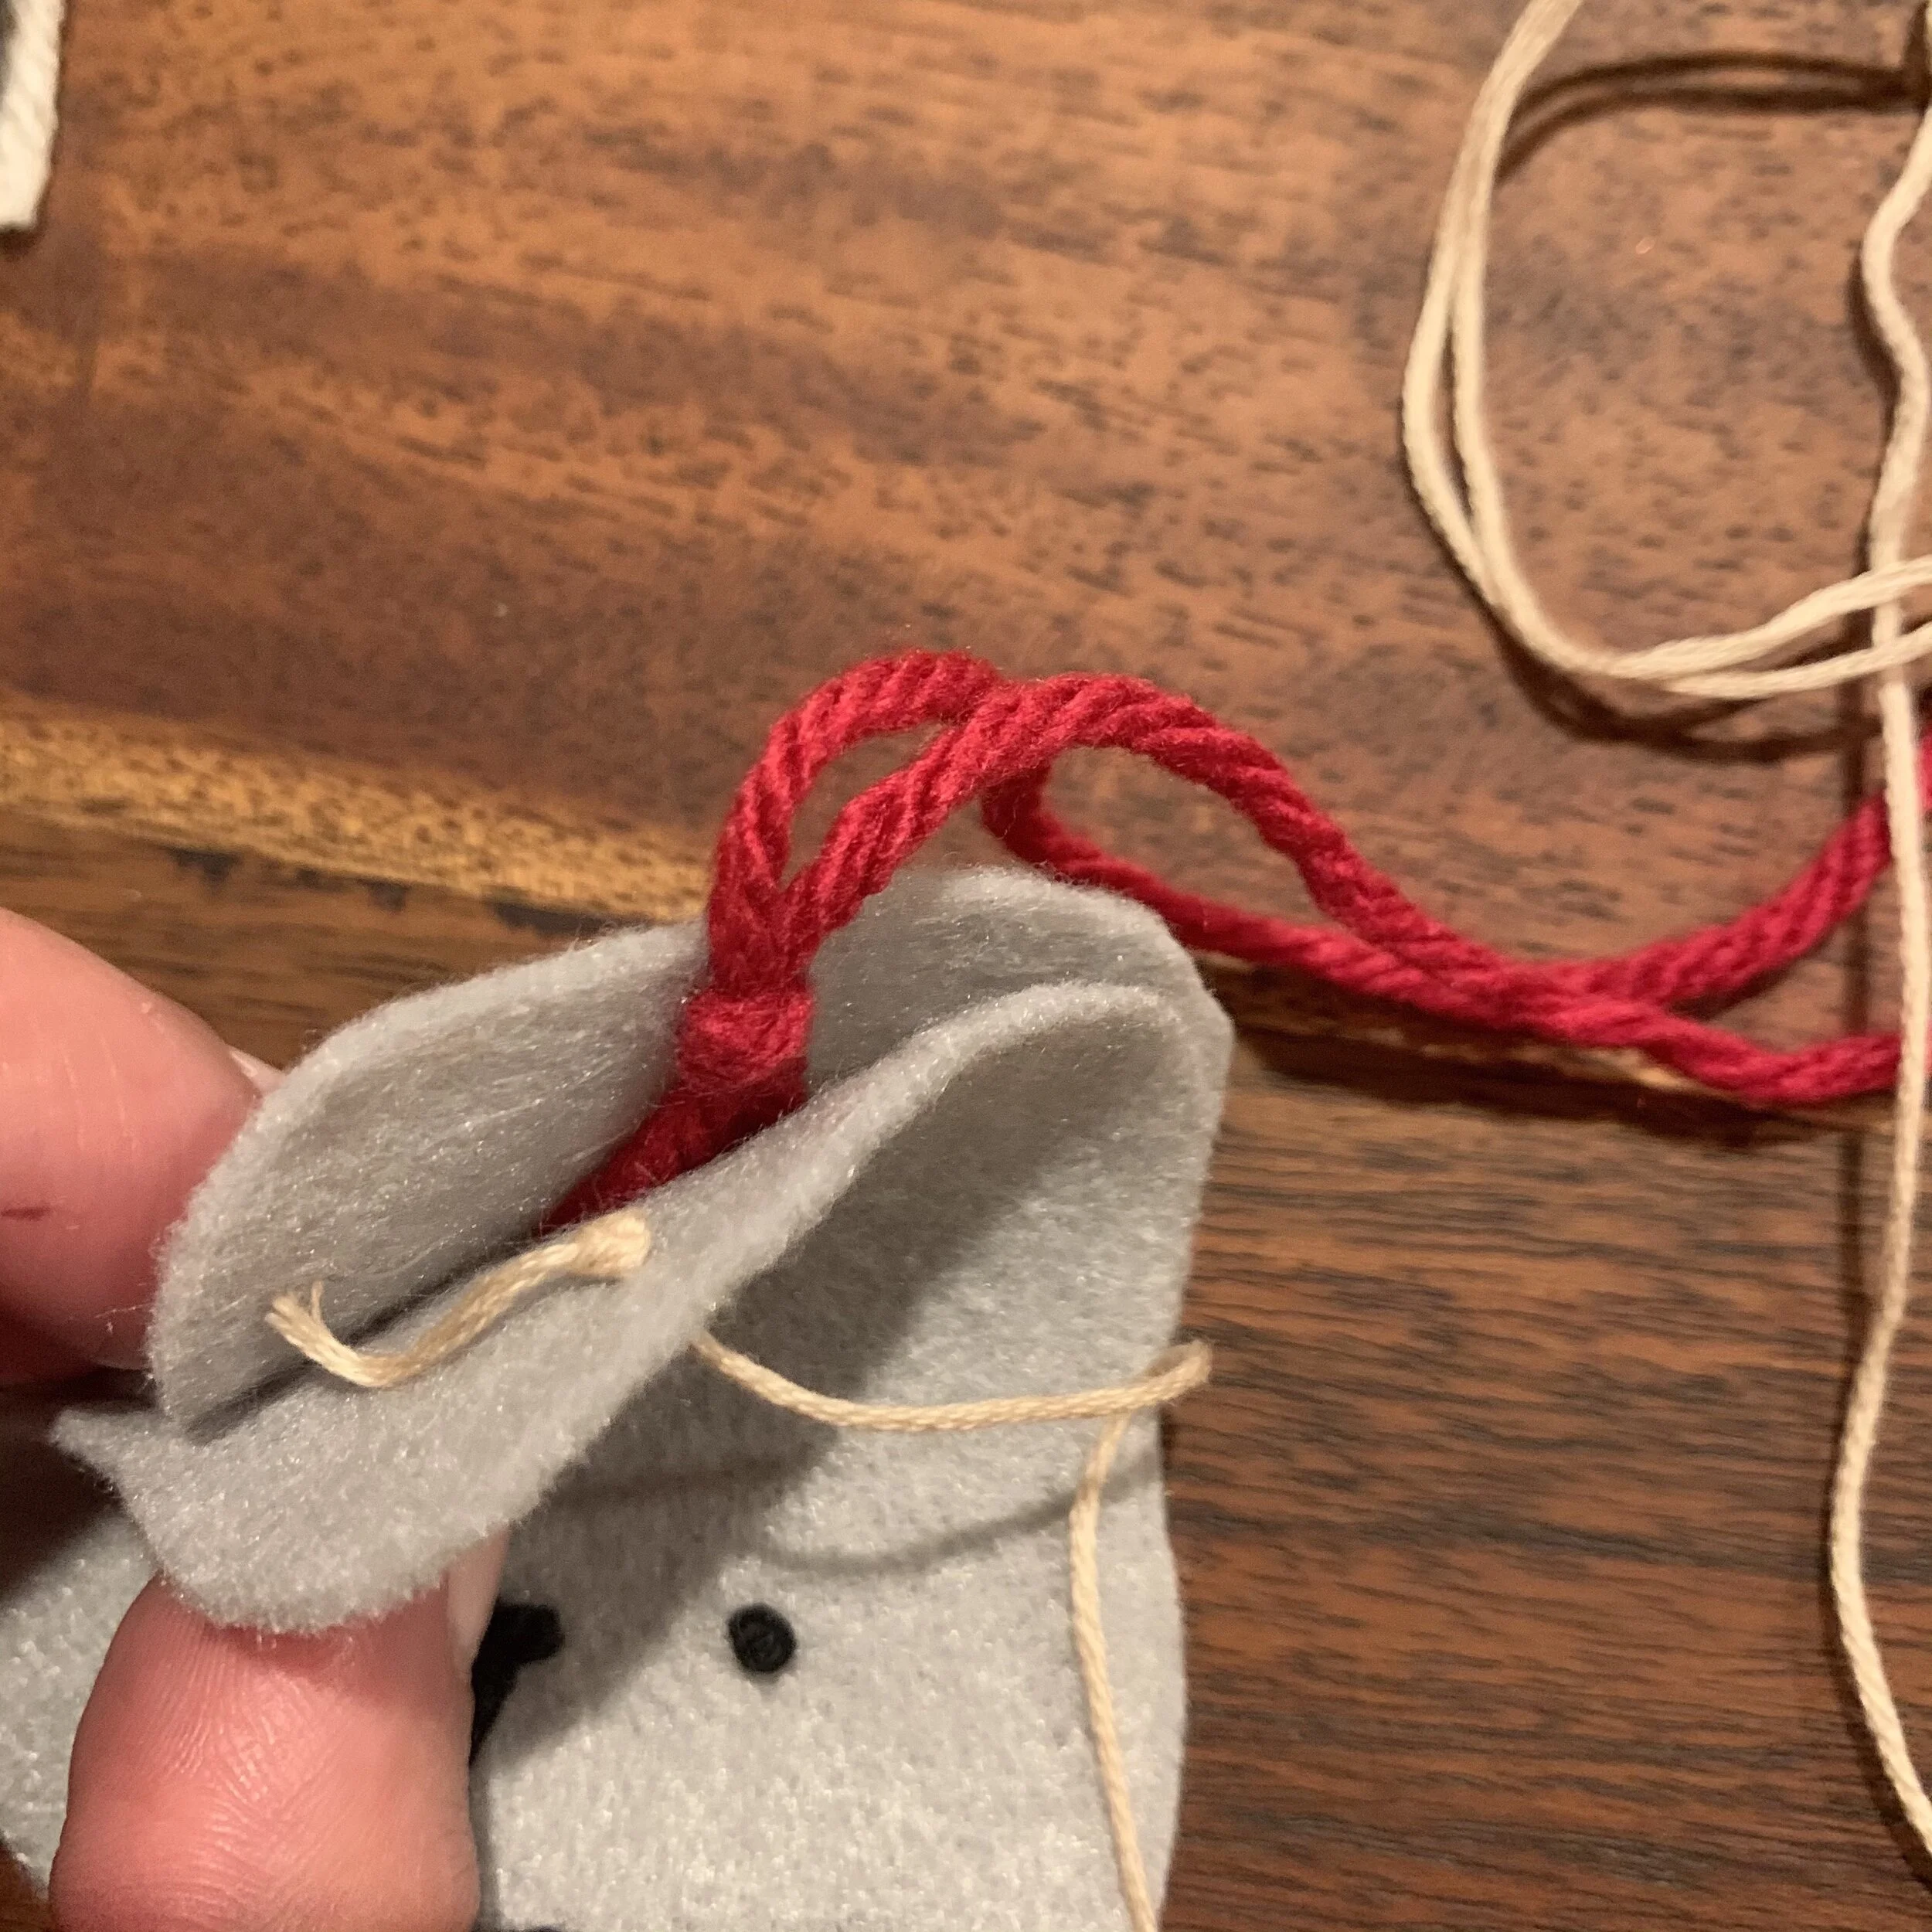


3. Continue stitching around the face till you get to the bottom middle. Grab your tassel, double knot the top a few times till it creates a knotted tail and hot glue to the back inside part of the face. Be sure that the top of the tassel meets the base of the face.
4. Once you do this you can resume stitching.


5. Once you get to the top corner, it’s time to start stuffing your little guy. Grab your cotton balls and tear the apart to make them fluffy and start filling it into the pocket you made.
6. When you get it stuffed to the right amount, continue stitching till you get back to where you started and end the stitch.


7. Take your hair piece and blanket stitch the single piece of felt all the way around - this is more for decorative purposes.
8. When you finish stitching, take your ears and place them on the front of your face pinning them in place till you get your perfect look. Once you get a position you like, hot glue them to the face. Take your stitched hair piece and hot glue on top of your ears.
9. You did it! you have your little lamb to bring you good fortune going into the new year!
If you have any questions, please don’t hesitate to reach out!


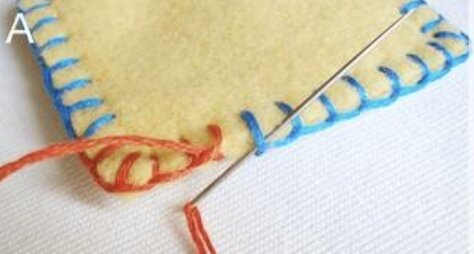
How to blanket Stitch
To get the stitch anchored, poke your needle down from the top layer so that the needle comes out the bottom at the same spot where you started, basically making a loop.
Send your needle under the loop stitch you just made. To do this, poke the needle under the stitch going sideways along the crack of the two layers. This gets your thread anchored.


To start your first true blanket stitch, poke your needle down from the top (#2 in photo D). This should be about 1/4" over from where the thread first came up, and about 1/4" up from the edge. To complete your first stitch, bring your needle up from the back, and through the loop of thread (#3 in photo D). This should create a straight line down from # 2 in the photo. Before pulling this stitch tight, be sure that your needle is in fact through the loop of thread, as shown in photos D and E.


To end the stitch

To connect your last stitch to your first stitch, slide your needle sideways underneath your first stitch, and pull your thread tight.
Now loop your needle through that stitch again, but before pulling it tight, send your needle through the loop to make a knot. Then pull it tight to complete the knot.
Cheers to the new year and be sure to tag us if you make your own Lucky Lana!
Ash

